
Predator Concrete Jungle Walkthrough
Posted by Darkness on December 10, 2006 (Updated: 12-May-2021)
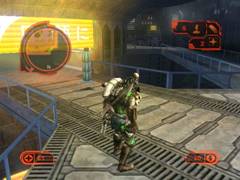
Level 19: Prey of the Clan
Hint for this level & the following: The helicopters can be taken out w/the Plasma Mines. The trick is that you have to be close to them on the same level or above.
- Once the level starts run up the left ramp a little way past the turn and turn around, another Predator will show up. The other Predator is on its way to kill the scientist at the weather station. Kill the other Predator as fast as possible. Tip: Use the disc to slow him down if he gets past you. Once he is our of your range you may as well start over as you will fail anyway.
- Once the other Predator is dead, continue up the path near (labeled Apollo Heights).
- Take the path until the sign Neptune Peak, jump onto the climbable wall. Climb to the top.
- Drop onto the ledge on the right and proceed straight and to the left till the end of the path and jump down to the right.
- Proceed north and the player will see another Neptune Peak sign. Proceed past the sign and past the sign ahead labeled Venus Beach.
- The Predator will come upon the platform with the scientist. Grab a scientist and a waypoint will appear. Bring the scientist to the DNA Scanner. A cut scene will appear.
- After the cut scene, kill all of the remaining AI. Doing this will deactivate the force field and allow the Predator to proceed to the next weather station.
- When facing the DNA Scanner, run left and take the path of the Venus Beach sign.
- Run towards the Unicon building. This will take the Predator to the sign labeled Callisto Spire.
- At the sign run right and grab a scientist, a waypoint will appear, head to the waypoint by heading into the building with the globe symbol above the entrance.
- Proceed through the hallway and this will take the Predator to the outside of the building where the DNA Scanner will be located to the right. A cut scene will show.
- Head back into the hallway. When out of the hallway, proceed left and left again until there is a sign labeled Callisto Spire. Go up the pathway under Callisto Spire, and the Predator will pass a sign called Triton Crest.
- From here, grab a scientist (waypoint will be revealed) and drop down to the lower level where the DNA Scanner is located. Once the scientist is brought to the DNA Scanner, a cut scene will appear.
- Kill the remaining AI and a force field will deactivate.
- Head pass the path where the force field was deactivated. There will be a green Apollo Heights sign. Jump on the climbable wall behind it. Climb it to the top.
- Proceed right and jump down to the lower walkway. The player will see another Apollo Heights sign, which will lead the player to the Atlas Round sign.
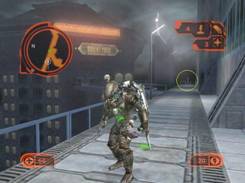
- Try and kill the two enemy Predators in this area. Once the energy of Stoneheart (larger Predator) has been depleted he will run away. Once Longspear (the thinner Predator) has been skull ripped, a ritual challenge will be unlocked and the level will end.
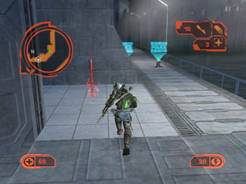
Level 20: Ten Thousand Ways to Die
Bonus Mission: Find and activate all 3 beacons throughout level.
- At the start of the level, jump down and proceed to kill all the enemies in this area. Once they are all killed, the force field will be deactivated.
- Proceed down the pathway where the force field was blocking (Marble Point).
- You will come upon the Titan Rise sign. To the right will be a force field.
- Kill all the AI in this area. The player will have to jump upper part of the building to take out the guards standing on the pillars. Once all the AI are killed, a Ronin bodyguard will appear. Attack him until he runs away.
On the upper ledge of this building will be the first beacon.

- Once that is done, the force field will be deactivated.
- Proceed towards that pathway and there will be a Ulysses robot guarding that bridge.
- Destroy the robot and proceed on the pathway. This will lead to Coral Soar.
- Proceed on pathway where there will be a building to the left with the arrow markings pointing up. Proceed to the last set of arrows pointing up and jump on the platform above it. Go right and drop down to the walkway below.
- Head North, and follow pathway. The Predator will see markings on this side of the building of arrows pointing down.
- Switch to Tech Scan and notice the white lines that will lead to a power box directly above the first (most Eastern) set of arrows.
- Destroy the power box. This will deactivate the force field in the hallway below the second set of arrows pointing down. Go in the hallway and destroy the power box. This will deactivate the electrified wall that the Predator will have to climb, making it safe.
- Exit out of the hallway and turn left and take the pathway to the climbable wall.
- Climb up the wall fall onto the platform and run around to the right.
- Fall off to the right and jump across to the other section just under the paradise meadows sign. From here make a left then fallow the path that leads around the building and crawl up the climbable wall.
- At the top go left, and jump down onto the bridge underneath the Terra Verde sign.
- Kill all the AI on the platform to deactivate the force field.
- Once they are killed a Ronin Guard will pop out, defeat him pronto!
- Doing this will deactivate the force field. Proceed down the walkway towards the colossus bowl.
On the lower platform of the Colossus Bowl is the second beacon.
- Jump up to the top platform and kill all AI in the area and using the Plasma mines destroy the super Ulysses.
- Proceed to the Delta Shores sign, (straight ahead at the end of the walkway will be the last beacon and on the other side will be the glaive upgrade).
Observe the cut scene and head back to the Colossus Bowl to finish off the missile launching guard.
- Proceed inside the room where the Ronin Guards are waiting patiently inside ready to be slaughtered mercilessly.
Level 21: Come to Mother
Bonus: if you kill all the ulysses on this level you receive an energy upgrade.
- In the starting room pick up the pulse mines and run into the hallway to destroy the box that is keeping you out of the room.
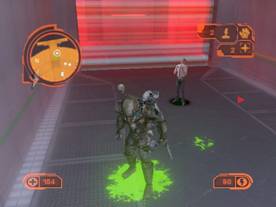
- The door will then open revealing a room full of evil stinking Ulysses robots.
- Slaughter all these sorry excuses for robots.
- Doing this will unlock the next door and give you a new way point.
- Up the stairs leads to a box that when destroyed opens the door the next room.
- Out the door head left into the office area and look on your radar for a tiny little white circle with a little white dot in the middle of it. This represents the target you need to grab.
- Make sure your wristblades are unequipped and grab the office worker.
- Doing this brings up a new way point. Bring the worker to the way point that is a DNA scanner.
- Doing this opens up the door to the final way point.
- Proceed to the way point to end the level.
Level 22: Hot time in the Old Town
- From the start point run straight out the doorway and switch to tech scan.
- Follow the white lines to the four energy boxes and destroy them. There is one power box on the ledge directly across the shaft exit, there is another on the upper ledge above the Opera House, there is one on the right side of the Opera house (if facing the Opera House, and there is one near the cathedral steeple.
There is a plasmacaster upgrade behind the steeple.
- Once they are destroyed head back to the streets. The level will change.
- Switch back to normal vision and kill the Monster Squad AI.
- Skull rip all the AI to end the level.
Level 23: Last Rites
- Start level and kill Stoneheart.
Tip: Keep a distance and unload as much of the Predator’s Ranged attack weapons.
Once that is done proceed with close ranged strikes. The circle & jump technique works well here, too.
Level 24: “If it bleeds…”
Bonus: if you destroy each fan in numerical order you get a bandolier upgrade.
- After cut scene kill the aliens to open the doors. Use the Combistick (non-edged weapons) on aliens, or else their acid blood will harm you. Grab all the Pulse and Sonic mines in the room. These mines are very handy””they can be dropped in front of gates to protect you while you open them, or attached to walls as you climb to slow or even kill aliens that are hounding you. They are also quite plentiful in the Main Chamber and Gen Room, so visit these rooms whenever you run low. Be sure NOT to use Plasma or Fire mines while climbing. They will knock you off walls and damage your health.
- Jump up through the hole in the ceiling and pull yourself up into the small room there. Head out the door.
- Turn right toward Fan One. At the end of the hallway, fall down to the bottom of the shaft.
- Move forward to the gate outside Fan One. Open it using Test of Strength.
- After destroying fan, turn around and leave the room. Jump on and climb up wall ahead of you.
- Climb to the top and enter room at the end of the hallway. Drop down to the floor level of this large Gen Room.
- There are two doors here. There is a door marked 4 to the West and a door marked 2 to the East. Take door 2 (it’s the bloody one).
- Fall down shaft at the end of this hall. The Predator will grab onto the opposite wall near Fan Two. Gecko climb to it (it’s about halfway down this shaft and clearly marked).
- After opening the gate and destroying Fan 2, exit the room and fall the rest of the way down this shaft. Follow this hall to the end. There will be a directional sign pointing toward Fan Three. Follow it (left).
- Fan Three is the first hallway on the right after the sign. Open the gate and destroy the fan.
- Turn right at the exit to Fan Three and follow the hall to the end.
- Jump the chasm here and climb to top level. Follow the short hall.
- Jump onto the wall at the end and Gecko Climb up and to the right to hallway.
- Fall off of the wall and proceed down the hallway here. You will end up back in the large Gen Room with two doors (2 and 4). Go through door 4.
- Fall down the shaft, run forward, and then around to the left (there are signs pointing the way). Open the gate and blow up the final fan.
- Go back out the way you came (right at first intersection, then climb wall). At the end of the hallway is the Gen Room. Destroy the Generator attacking the glass sides…level will end..
In the generator room is the Smart Disc upgrade.
Level 25: Bug Hunt
Make sure to kill 30 aliens to open up the pathway to finishing the level. Kill 50 for an Alternate Skin.
- Start level drop down and exit to shaft 4.
- Fall down again and head straight. Make a right at the fan 4 sign.
- Follow the path to the ‘1’ up pillar and turn left.
- Follow the path to the dead end and jump across.
- Climb up the wall into the shaft above fallow the path around the bend make sure to jump across the gap and at the end make a left.
- Fall down through the whole back towards the “If it bleeds…” spawn point.
Level 26: The New Flesh
- At the start of the level you want to jump around a lot to stay alive. After some time, the Ronin Guards will come out and help. The Ronin will provide a distraction so you can get some hits in on Hunter.
- Proceed to attack Hunter; once his energy is low, he will jump out the window.
- Level will end.
Maul Upgrade: Alternate Costume: Destroy all monitors
Level 27: End of Empire.
1. Start the level and proceed to chase down Hunter and kill him. You can use your smart disc here to good advantage.
Tip: Let the Ronin Guards attack Hunter until they perish.
Game end. (Tip: let the credits play through to see the epilogue.)


could you help me find all costumes